Creating disk image with Klennet Recovery
This tutorial describes how to create a disk image file.
You should use a disk image file when the disk you are recovering has bad sectors.
The idea is to deal with the bad sectors once, produce an image file on a known-good disk, then recover data using the image file.
This way, you don't have to worry about bad sectors while recovering.
Also, if the device you are recovering is slow by its nature, like a USB 2.0 thumb drive,
you can make an image of it and use the image file for recovery instead of the physical thumb drive.
This substitution will often provide for a more comfortable recovery.
Important: never save the image to the same drive you are imaging.
This will irreversibly damage the source drive and make any further recovery impossible.
Specialized hardware reset devices
If you plan to use some hardware reset device, like a USB-controlled power relay, you need to set it up.
For more details on the setup, refer to Drive failure handling page.
However, if you use the relay, it's unlikely you are doing it for the first time.
Klennet Recovery integration is rather basic but should be sufficient.
If it proves not to be, file a support request.
You also need to test that your setup actually works.
You don't want to find out something is not configured correctly at the end of a three-hour imaging pass.
The reasonable test method is to get a good drive, similar to, but not the one you need to image, and start imaging.
After a minute or two, pull the data cable (or, with USB, the only cable) and verify that the relays click as expected.
Target format
Next, you must choose the target disk image file format.
-
If you plan to use the disk image with different data recovery software, choose raw disk image.
Most any data recovery software can load raw disk images.
-
If you think the filesystem on the disk is not severely damaged and intend to try to plug the disk into a virtual machine,
choose VHDX.
VHDX files produced by Klennet Recovery can be attached to a Hyper-V VM.
-
You can make a VHD image, but this format is pretty much obsolete.
In addition, VHD files have a maximum size limit of 2 TB and are thus not suitable for large disks.
Block sizes
The last is the question of block sizes and timeouts.
The defaults (256 KB at 500 ms and 32 KB at 1000 ms for the first and second pass respectively) are suitable for most cases.
On badly damaged drives, you may want to go one step lower on both first and second pass block sizes,
but this may not produce significant improvement.
Badly damaged drives require individual consideration.
You can start with the defaults and experiment to see if small changes give you better performance.
However, make sure you are not overly stressing the damaged drive.
If you suspect that the drive continues to degrade while you are trying to create a disk image, and you have no experience with this, consider sending the drive to a lab for imaging.
See also benchmark results for different block sizes.
The process
Identify and select the drive you want to image, then click "Create" in the "Disk image" section on the toolbar.
Choose the target format from the dropdown and then specify the file name.
The default file name is generated from the model name and the serial number of the source drive.
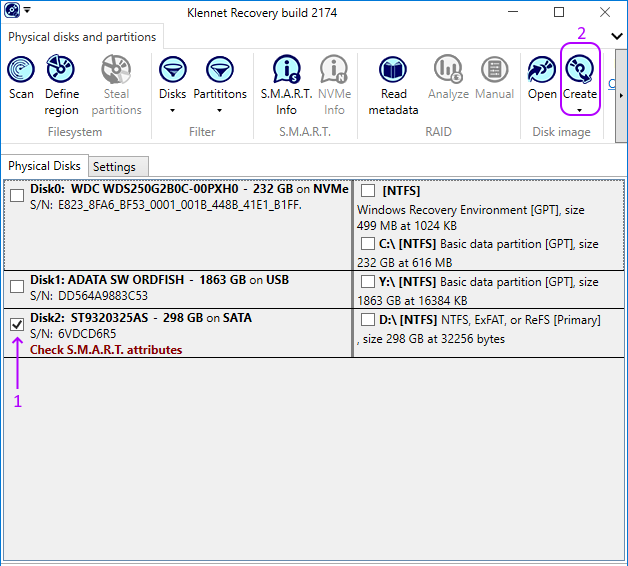
Select the checkbox next to your source drive (1) and click Create (2).
When the imager screen opens, click "Start".
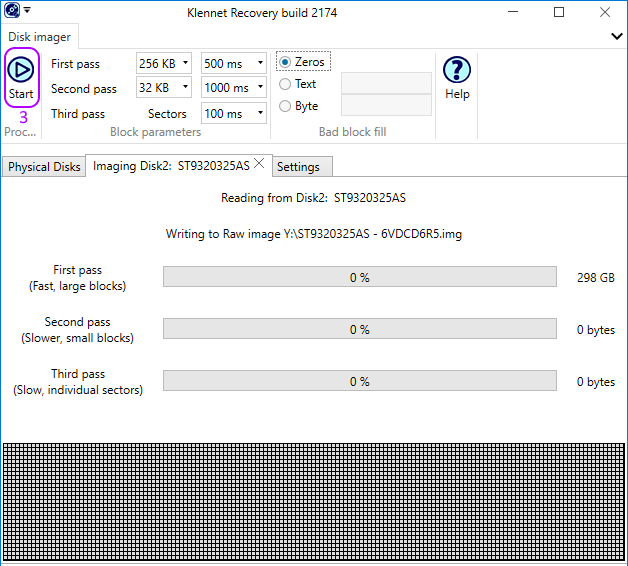
Disk imager initial screen.
There are three progress bars for three passes, and the map shows the blocks that Klennet Recovery
will retry on the next pass in yellow and the bad blocks in red.
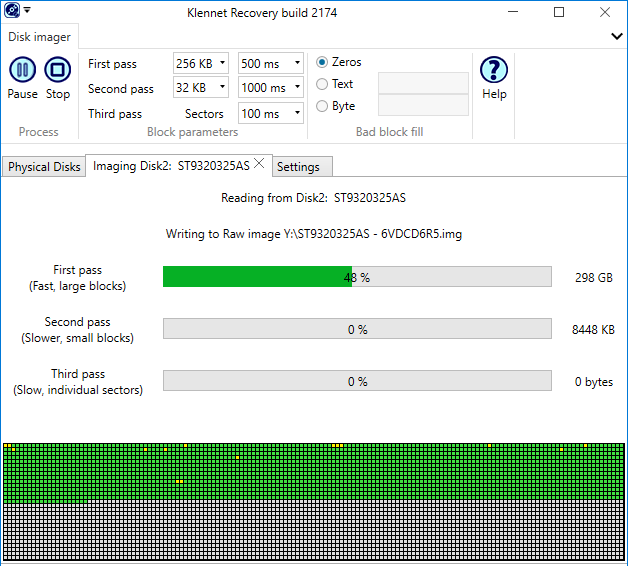
Disk imager progress.
Note the yellow blocks on the map - Klennet Recovery will retry them in the subsequent passes.
When done, the message shows the number of bad blocks.
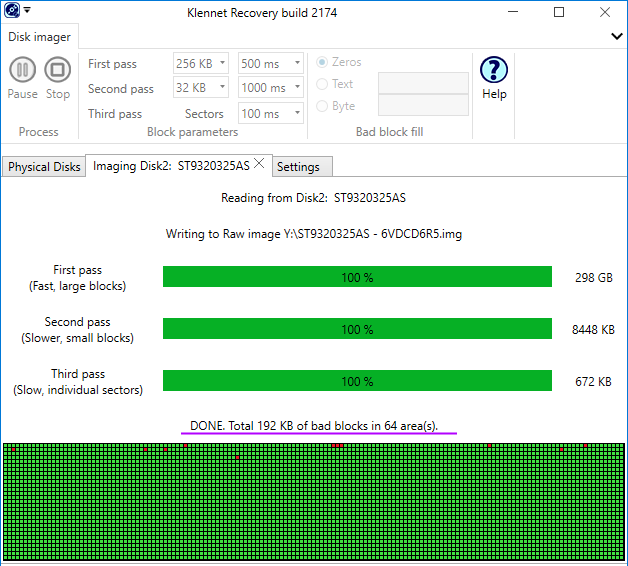
Disk imager is done.
Note the red bad blocks on the map and the bad block stats (underlined).
To load the image file for recovery, use the "Open" button in the "Disk image" section of the disk list view toolbar.
Completing the image does not automatically load the resulting image into Klennet Recovery.
Once the image is loaded, proceed with recovery as if you were recovering from a physical disk.
See the simple filesystem recovery tutorial for an example of the next steps.