Simple filesystem recovery
This tutorial describes the most simple case of single filesystem recovery.
You should follow this process if you are recovering
- deleted files,
- a formatted volume,
- a volume that is listed as a RAW filesystem.
Preparations
Do not install anything onto the drive from which you are recovering your data.
If you need to install Klennet Recovery, install it onto a different drive.
If you need to connect a drive from a different PC, avoid USB if possible.
It is always best to use SATA connections.
Especially, USB connections tend to go flaky if your hard drive has bad sectors on it.
Selecting the partition to scan
The first thing you see after Klennet Recovery starts is your disk and partition list.
You need to identify your disks and the partition you want to recover.
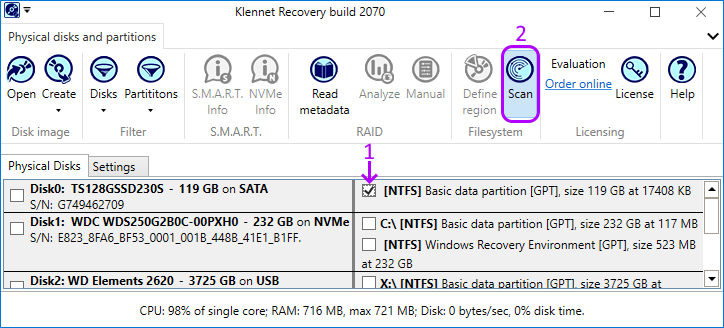
Typical disk and partition view
The disk list view uses the same disk ID numbers as Windows Disk Management (the Disk0: and Disk1: labels on the left).
Also, Klennet Recovery shows the drive letters assigned to the partitions.
Your damaged partition may or may not be assigned a drive letter, depending on the damage.
Some partitions (like the Windows Recovery Environment partition in the screenshot above) naturally have no drive letter assigned to them.
When you have selected the disk or the partition you need to recover, click Scan.
You do not need to specify the filesystem type explicitly.
Scanning
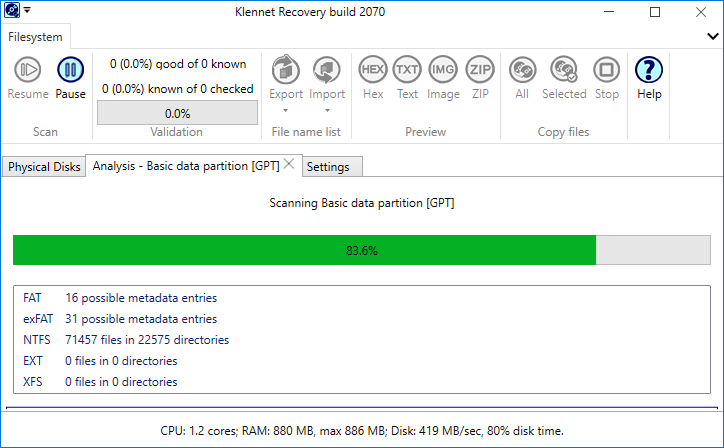
Filesystem scan progress
The scan is fully automatic.
It does not require any intervention.
However, if it runs for longer than several hours, there probably is a problem with bad sectors on the disk.
You should image a disk with bad sectors first to avoid further damaging it.
During the scan, Klennet Recovery displays the number of files and directories found, broken down by filesystem type.
FAT and exFAT filesystems often produce false positive recognition of their metadata entries.
You should expect at least some entries indicated for FAT and exFAT, as in the example above (16 and 31 entries, respectively).
At the end of the scan, Klennet Recovery reevaluates FAT and exFAT entries and eliminates most false positives.
Selecting and copying the files
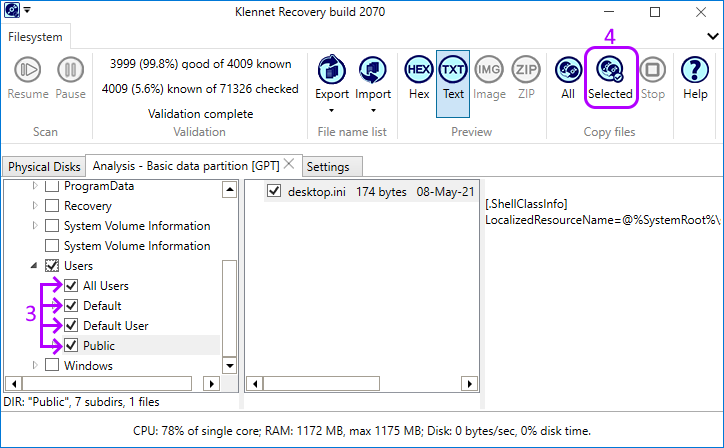
Recovered filesystem content view
Once the scan is complete, you should look through the directory tree on the left side and select what you want to copy out.
When done with the selection, click Copy files - Selected.
You will be prompted for the target location, and the copying starts.