Synology NAS recovery
This tutorial describes recovering data from a Synology NAS.
The Synology stores data on a set of 3.5" or 2.5" hard drives.
Optionally, a set of M.2 NVMe devices can be used as a cache.
The cache is either read-only or read-write.
- If there are no cache devices, ignore anything related to cache in this tutorial.
- If the cache is read-only, you don't need it for recovery. However, I recommend you still attach the cache.
- If the cache is read-write and the cache is not available, the recovery quality degrades.
- If the cache is read-write, the cache is not available,
and the option "Pin BTRFS metadata to cache" was enabled in Synology settings,
the recovery quality degrades significantly.
I made the screenshots in this tutorial using a disk set from Synology DS920+ (DSM 7.2-64570 Update 3).
The overall process
Synology storage layout is like an onion.
The recovery of the Synology NAS in its simplest form is just reading the metadata of the different storage layers repeatedly.
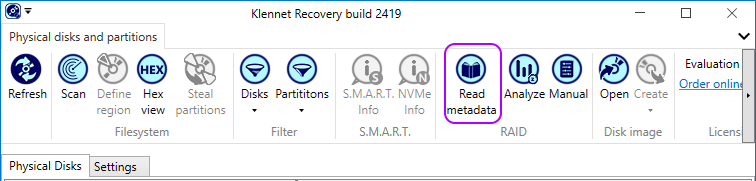
In every layer, select the appropriate source disks, then click Read metadata on the toolbar.
Eventually, you arrive at a scannable filesystem.
It is preferable that you select the correct items to read the metadata from, but it is not really required.
If you just select everything and read metadata from everything, Klennet Recovery still figures out the layout.
Selecting correct items gives you less clutter and, more importantly, some understanding of what might be missing.
Partition layout
- First, physical drives are split into partitions.
Cache drives only have one partition each.
Data drives have multiple partitions: one for the operating system (DSM), one for swap, and the data partitions.
- Then, the partitions are combined into md-raid arrays. System and swap arrays are RAID1, while the data array level depends on what RAID you use.
- Then, Synology creates an LVM volume group on each md-raid array.
- Finally, it allocates the data and the cache volume from the corresponding volume group.
- If there is a cache, each cache volume is linked to its data volume, creating one more layer.
Synology does not use BTRFS RAID capability.
Instead, it uses md-raid and LVM to manage RAIDs and volumes;
it then creates BTRFS single-disk filesystems on the data volumes.
Step 1 - Identifying and selecting partitions
Synology defines two distinct sets of RAID modes:
- standard RAID0, RAID1, RAID5, RAID6, and RAID10, and
- SHR (Synology Hybrid RAID), with a single-drive or two-drive fault tolerance.
This distinction creates two scenarios for data recovery, but not in the way one might expect.
The difference between the usual RAID and SHR is not in the parity calculation or other fault tolerance methods
but in the ability to use drives of different sizes in the same pool.
Synology will split the drives into sections, combine the sections into several arrays,
and then combine the arrays to produce the entire pool capacity.
This feature can also be used to perform a rolling upgrade,
replacing all drives one by one with drives of larger size and resynchronizing the array after each replacement.
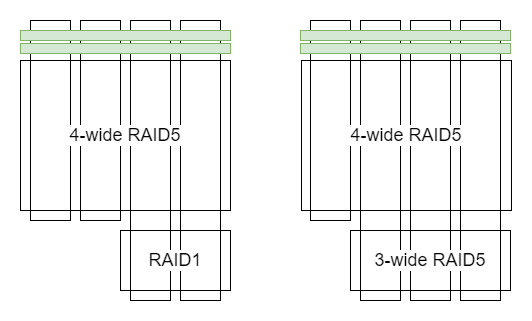
SHR partition and array layouts with drives of different sizes.
Note that RAID levels don't have to be identical; only the same fault tolerance level is required.
Using differently sized drives or a rolling upgrade produces a slightly more complicated partition table
than a simple setup of equally sized drives.
The Synology data drive always starts with two partitions
- [MD-RAID-1] system partition;
- [MD-RAID-1] swap partition;
followed by one or more data partitions, depending on the configuration.
A cache drive only has one partition.
Once you have identified your case from the choices below, select the appropriate partitions and click
Read metadata on the toolbar.
Data drives - same size, never upgraded
This is the most simple case.
There are four drives with identical partition layout.
The layout is the same in SHR and RAID5 modes.
Synology simple partition layout, SHR or RAID5, with the data partitions selected.
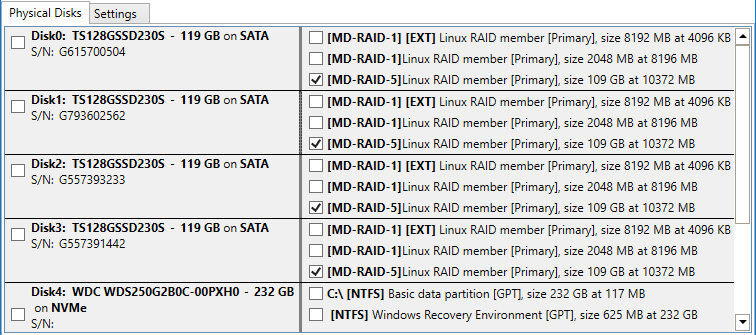
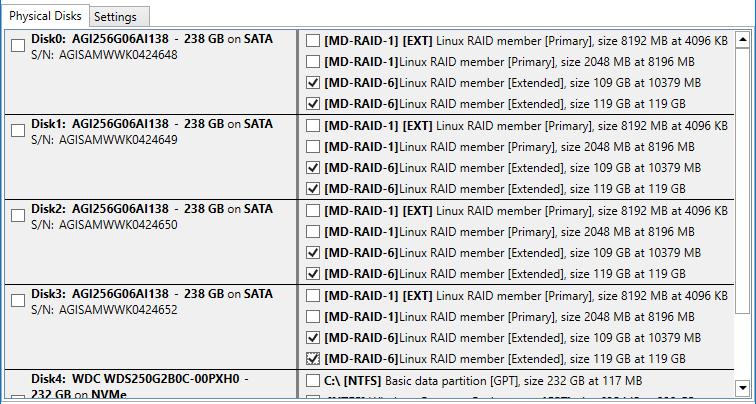
Data drives - different size
If the drives are of a different size, the small drives have one data partition per drive,
and the large drives have two partitions per drive.
SHR may consist of two arrays with different RAID levels.
The only requirement is that all arrays have the same fault tolerance,
i.e., RAID5 and RAID1 both can survive a single disk failure,
so RAID5 and RAID1 can be mixed to achieve the best possible use of disk space.
The same applies to RAID6 and 3-way RAID1.
Two 120 GB disks (one partition each) and two 240 GB disks (two partitions each).
Note different RAID levels (RAID5 vs RAiD1) between the first and the second set.
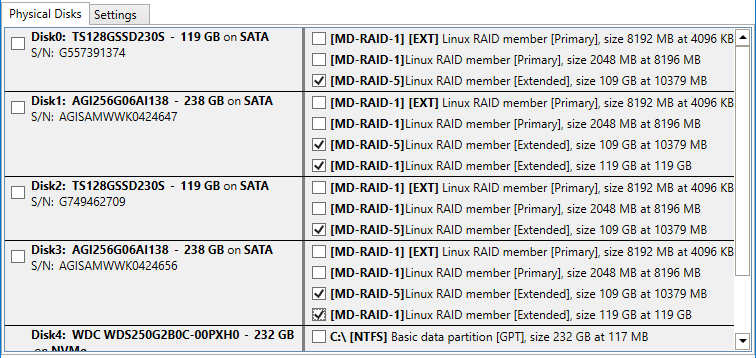
Data drives - after upgrade
Suppose the original small drives were at some point replaced with bigger drives.
There will be two sets of partitions,
the first corresponding to the original smaller drives and the second to the extra space on the larger drives.
Synology DSM does not modify existing partitions when expanding the disk pool.
It only adds new partitions as required.
Four disks in SHR2 configuration after the original 120 GB drives were replaced with 240 GB drives.
Cache drives
Cache drives only have one partition each.
They do not contain the OS partitions, as the cache drives are not bootable.
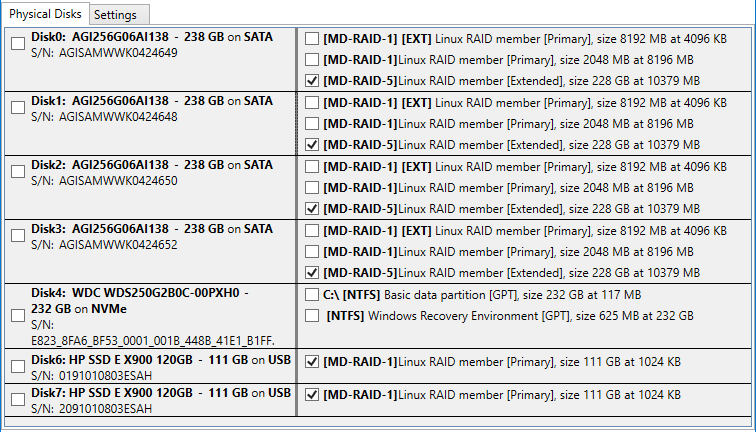
Synology SHR1 array and cache.
Cache drives are the two HP SSDs at the bottom, each having one MD-RAID-1 partition.
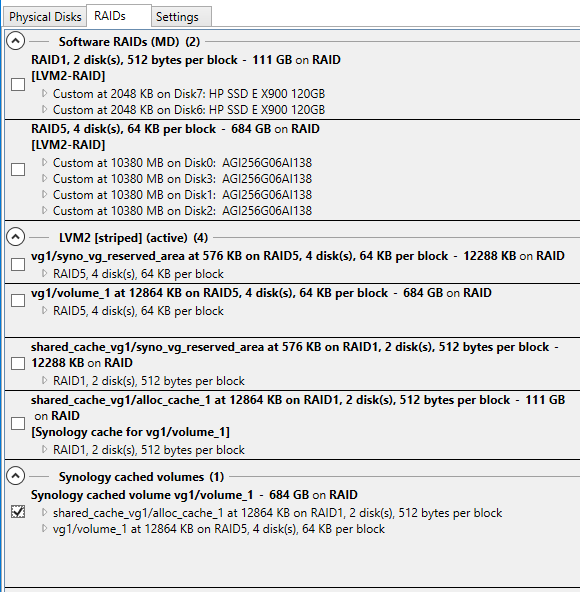
Step 2 - md-raid arrays
The next layer of the Synology storage system is the md-raid.
Depending on the configuration, there are several possible combinations of arrays.
Regardless of the number of arrays available and the RAID levels, select all the MD arrays and click
Read metadata again.
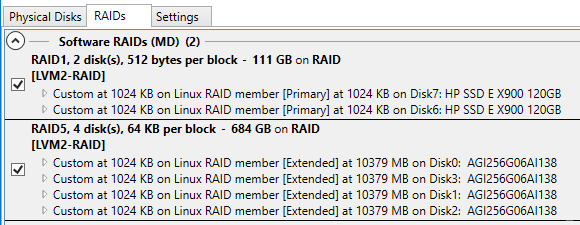
Synology md-raid arrays containing the cache (top) and the data (bottom) volumes.
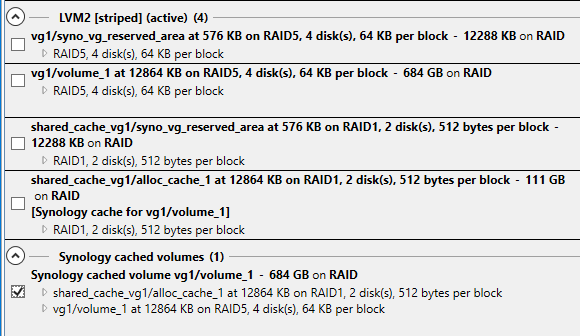
Step 3 - Attaching the cache volumes (if any)
Skip this step if the Synology NAS you are recovering did not use the NVMe cache.
Klennet Recovery identifies the cache and the volume it should be attached to,
as shown in the example below.
The volume associated with the cache is identified by name (vg1/volume1 in this example)
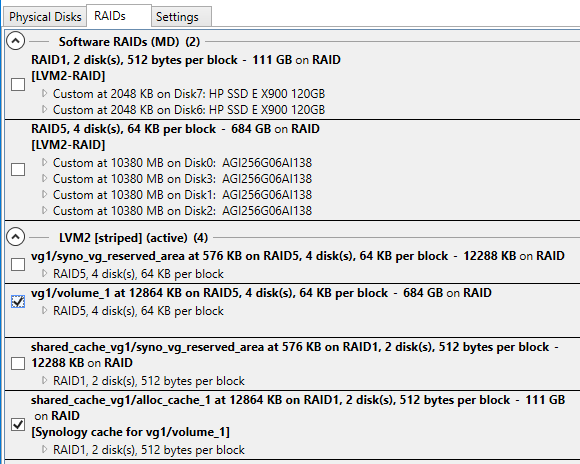
Synology cache and its corresponding data volume (vg1/volume1) selected.
Select both the cache and its data volume and click Read metadata again.
This finally produces a cached volume aggregate, as shown below.
Synology cached volume
Step 4 - Scanning the filesystem
If your case does not involve the cache volume, select the LVM volume named vgX/volume_Y.
In most cases, both X and Y are 1.
There are several entries if the Synology unit was configured for multiple volumes.
For multiple volumes, scan them in turn. Do not run multiple scans simultaneously.

Synology data volume selection, no cache.
If your case includes the cache, select the aggregate cache volume produced in Step 3, as shown below.
Synology data volume selection, with cache.
Once the appropriate volume is selected, click Scan on the toolbar.

Step 5 - Finding share contents
When the scan finishes, you arrive at something like a screenshot below.
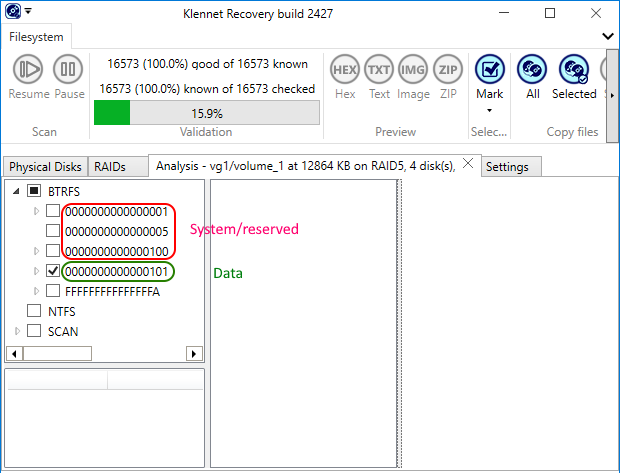
Synology BTFS filesystem directory structure.
The first directories, up to and including number 100, are used for Synology metadata and whatever other technical purposes.
The shares start with the number 101.
If you have multiple shares, you have to figure out which is which by looking at the contents.
Now select whatever files you need and copy them out.
Copying files back
If you end up copying the recovered files back to the Synology NAS, there might be an issue.
Specifically, Synology stores extended attributes for files in subdirectories called "@eaDir".
Klennet Recovery does not care if these are Synology system directories, so these get recovered along with everything else (as of Jan 2024).
When you copy your recovered data back to a Synology unit, Synology will produce all sorts of errors because Synology does not like someone writing to its reserved directories.
So, you may want to find all directories named "@eaDir" in your recovered data and delete them.
Your Synology NAS will regenerate them as needed.
Use the Windows Explorer search function or your file manager of choice.